
Can You Freeze Banana Bread Slices for Later?

Yes, you can and should freeze banana bread slices to lock in fresh texture and give yourself grab-and-go portions whenever a craving hits. Freezing works because it stops moisture loss and slows the staling process cold, so a slice pulled from the freezer in October tastes almost like it did the day you baked it. The core workflow is simple: cool completely, slice, flash-freeze if you have the time, wrap each piece, seal it in an airtight bag, label it, and freeze.
Here’s the whole method in one glance:
- Let the loaf cool fully on a rack, usually 2 to 3 hours, before you touch a knife.
- Slice into portions between half an inch and one inch thick.
- Flash-freeze slices on a sheet pan for 30 to 60 minutes so they don’t clump together.
- Wrap each slice tightly in plastic wrap or foil, then place wrapped slices in a freezer-safe bag or vacuum-seal them.
- Press out excess air, label with the bake date, and freeze for best quality within a few months.
The USDA generally treats frozen food as safe indefinitely at 0°F, but banana bread’s texture and flavor start to slip after a few months, which is why the 3-month mark matters more for quality than for safety. At Bell’s Protein Pantry, we build our mixes with freezing in mind, because we know busy mornings depend on having something good already waiting for you.
Key Takeaways
Freezing banana bread slices preserves flavor and texture for up to 3 to 4 months when you cool, wrap, and seal them properly before freezing.
| Point | Details |
|---|---|
| Cool completely first | Let the loaf rest on a rack for at least 2 hours before slicing or wrapping. |
| Slice for your use case | Cut half-inch to one-inch slices for faster thawing and better portion control. |
| Flash-freeze before bagging | Freeze slices on a sheet pan for 30 to 60 minutes so they don’t stick together. |
| Wrap and seal tightly | Double-wrap or vacuum-seal and press out air to prevent freezer burn. |
| Use within about 3 months | Label with the date and aim to eat frozen slices within a few months for best quality. |
| Choose a freezer-ready mix | Bell’s Protein Pantry’s Banana Bread mix holds up well frozen thanks to its dense, high-protein crumb. |
Table of Contents
- Should You Freeze Slices or the Whole Loaf?
- How Do You Freeze Banana Bread Slices Step by Step?
- Which Wrapping Materials Work Best for Slices?
- How Long Does Frozen Banana Bread Stay Good?
- What’s the Best Way to Thaw and Reheat Frozen Slices?
- Does Freezing High-Protein or Low-Sugar Banana Bread Need Different Care?
- Sources
Should You Freeze Slices or the Whole Loaf?
Slicing before you freeze gives you speed and portion control; freezing the whole loaf gives you better moisture retention over a longer stretch. Neither is wrong. The right call depends on how you actually eat banana bread.
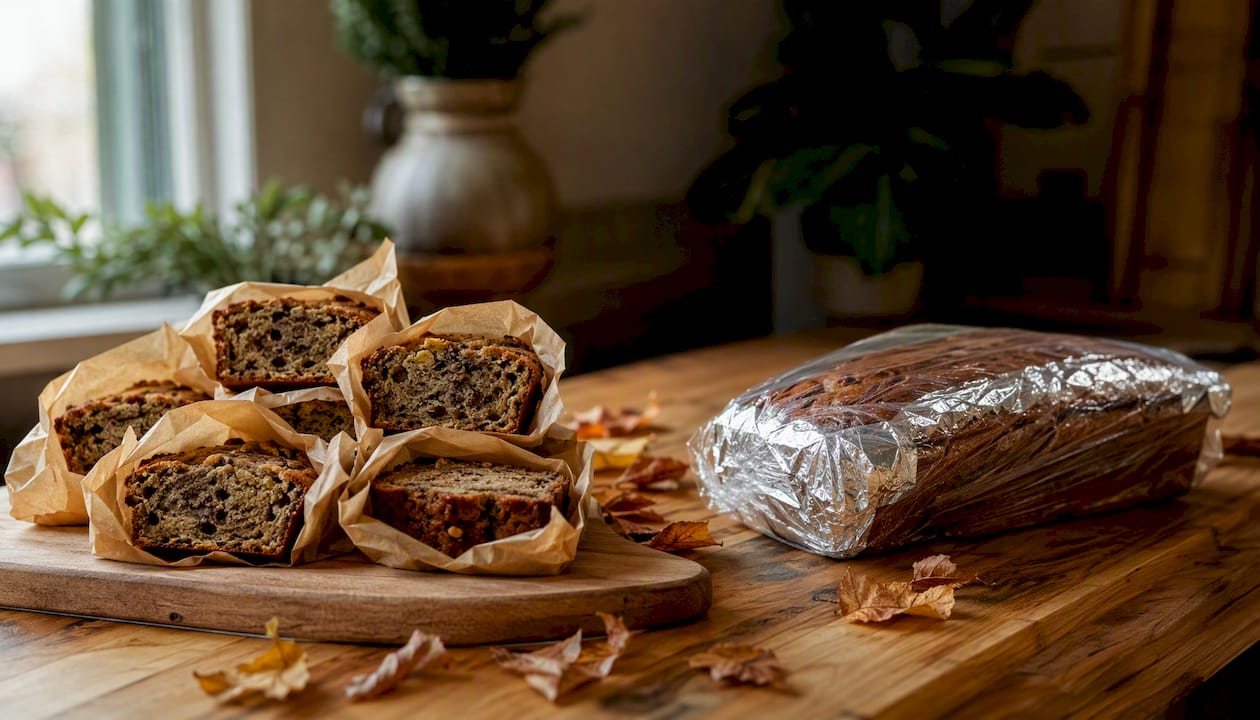
If you’re the only one in the house working through a loaf, or you’re prepping breakfasts for the week, slices are the smarter move. You thaw exactly what you need, toast it straight from frozen, and never end up gnawing on a stale end piece because the rest of the loaf sat out too long. Individual slices do have more surface area exposed to freezer air, though, which makes them slightly more vulnerable to drying out than a whole loaf if you skimp on wrapping.
Freezing the whole loaf makes more sense when you’re storing it for later gifting, planning to serve a crowd, or simply don’t want the hassle of individually wrapping six or eight pieces. A whole loaf wrapped tightly in plastic and foil holds up well for up to three months, though it takes several hours at room temperature to fully defrost.
| Factor | Freeze by Slice | Freeze Whole Loaf |
|---|---|---|
| Best for | Single households, meal prep, lunchboxes | Gifting, feeding a group, long-term storage |
| Thaw speed | Minutes (toaster or counter) | 3 to 4 hours at room temperature |
| Moisture retention | Good with proper wrapping | Slightly better overall |
| Freezer burn risk | Higher if under-wrapped | Lower due to less exposed surface |
| Everyday convenience | High, grab one piece anytime | Lower, must thaw the full loaf |
For most home bakers reaching for a quick breakfast or snack, slices win on convenience without sacrificing much on quality.
How Do You Freeze Banana Bread Slices Step by Step?
Getting this right comes down to sequence and patience more than any special equipment. Skip a step and you’ll notice it in the texture three weeks from now.
- Cool the loaf completely. Set it on a wire rack for at least 2 hours, longer if it’s a dense, high-protein loaf. Wrapping warm bread traps steam, and that steam turns to ice crystals that wreck the crumb.
- Slice to your preferred thickness. Half an inch to one inch works for most people. Thicker slices hold moisture better; thinner slices reheat faster.
- Flash-freeze on a sheet pan (optional but worth it). Lay slices in a single layer on a parchment-lined, rimmed sheet and freeze for 30 to 60 minutes until firm. This keeps them from fusing into one frozen brick, a trick borrowed straight from how bakers freeze muffins.
- Wrap each slice individually. Use plastic wrap, parchment, or foil. Double-wrapping, foil first and then a zip-top bag, adds a real layer of protection against freezer burn.
- Transfer to a freezer bag or vacuum-seal. Squeeze out as much air as you can before sealing. A vacuum sealer removes nearly all of it, which extends quality even further.
- Label with the date and a “use by” reminder. Write the bake date and a note to use the slices within about 3 months for best texture.
Pro Tip: Flash-freezing first and then single-wrapping each slice gives you nearly the same protection as double-wrapping, with less plastic used. If you bake often, a vacuum sealer earns its keep fast.
Equipment-wise, you don’t need much: a rimmed baking sheet, parchment paper, plastic wrap or foil, freezer bags or a vacuum sealer, and a permanent marker for labeling.
Which Wrapping Materials Work Best for Slices?
The wrap you choose affects how much moisture you keep and how long freezer burn stays away. Here’s how the common options stack up:
- Foil creates a strong barrier against air and light, though it can dent and tear with repeated freezer handling.
- Plastic wrap clings tightly to the slice surface, which helps seal in moisture, but on its own it’s a thinner barrier than foil.
- Parchment paper works well as a nonstick layer between slices if you’re stacking them in one container, though it isn’t airtight by itself.
- Freezer bags give you an airtight seal when you press out the air manually, and they’re the most practical everyday option.
- Vacuum sealers remove nearly all the air around the slice, which is the single best defense against freezer burn if you bake often enough to justify owning one.
If your loaf has frosting, a glaze, or a streusel topping, freeze it unfrosted whenever possible. Toppings tend to get soggy or separate once thawed. Add frosting or a drizzle after the slice has thawed and reheated instead, and it will look and taste like it just came off the counter.
How Long Does Frozen Banana Bread Stay Good?
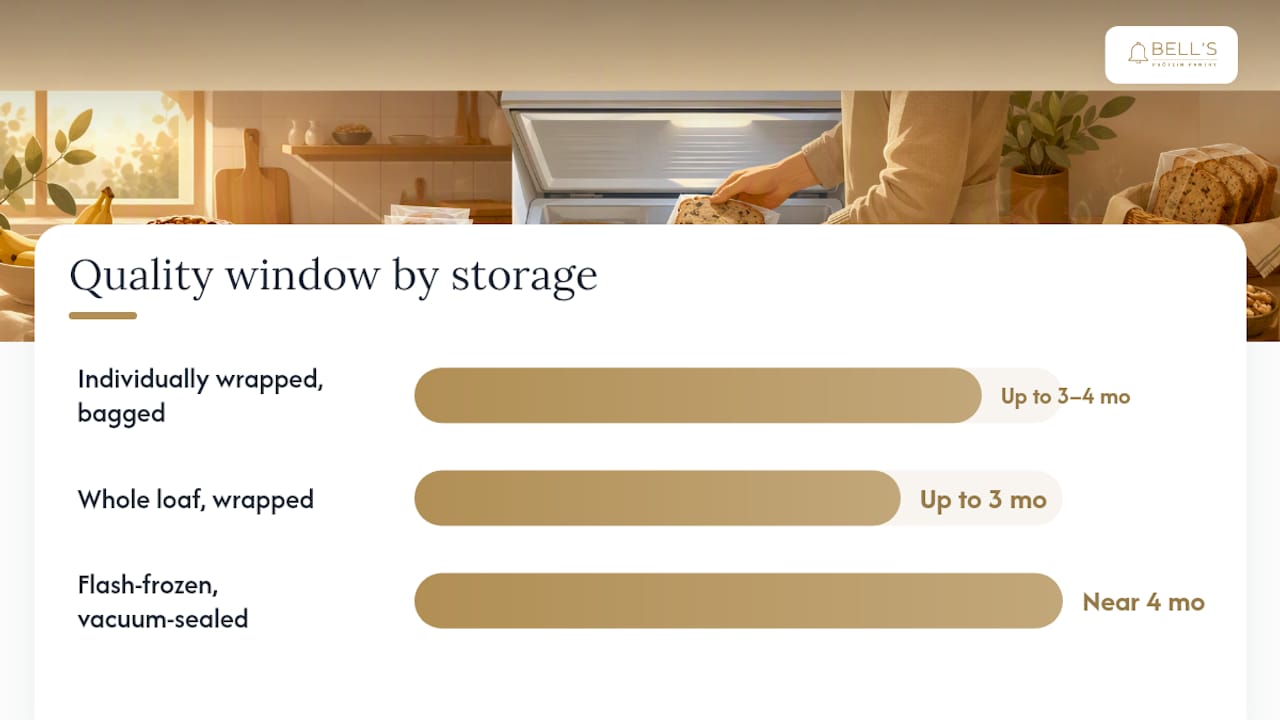
Frozen banana bread slices taste best within about 3 months, and you can usually stretch that to around 4 months if they’re wrapped well, according to guidance from Simply Recipes. Beyond that window, the bread is still safe to eat as long as your freezer stays at 0°F, but the texture starts to suffer, and some guidance notes that quality peaks around the three-month mark even though safety extends much longer.
| Storage Method | Recommended Quality Window |
|---|---|
| Individually wrapped slices, bagged | Up to 3 to 4 months |
| Whole loaf, wrapped in plastic and foil | Up to 3 months |
| Flash-frozen slices, vacuum-sealed | Closer to the 4-month end of the range |
Freezer burn shows up as dry, grayish or white patches on the surface, sometimes with a slightly leathery texture where ice crystals pulled moisture out of the bread. If you spot a small patch, you can usually trim it away and still enjoy the rest. If the whole slice smells off or feels hard throughout, toss it.
A few habits keep freezer burn from ever becoming a problem:
- Press out all the air you can before sealing, whether you’re using a bag or a vacuum sealer.
- Double-wrap or vacuum-seal instead of relying on a single layer of plastic.
- Freeze slices as soon as the loaf is fully cool, rather than letting it sit out for a day first.
- Keep your freezer at a steady, consistently cold temperature, since fluctuating temps cause repeated thaw-refreeze cycles that speed up moisture loss.
What’s the Best Way to Thaw and Reheat Frozen Slices?
Your reheating method changes the outcome more than people expect. A toaster gives you crisp edges and a warm center in under three minutes, which makes it the fastest and, for a lot of bakers, the best option for a single slice. If it’s lightly wrapped in foil, leave the foil on and pop the whole thing in a toaster oven instead of an open-slot toaster.
For warming several slices at once, an oven or toaster oven set to 325 to 350°F for 10 to 15 minutes brings back that just-baked warmth evenly across the batch. A room-temperature thaw is the gentlest option: leave a wrapped slice on the counter for about an hour and it softens naturally without any added heat. Overnight in the refrigerator works too, and it’s the most even method if you’re not in a rush, since thawing in the fridge keeps the crumb from getting gummy.
Microwaving is the fastest option but the riskiest for texture. Use short 15 to 20 second bursts, and cover the slice with a damp paper towel to trap steam and keep it from drying out.
- Toaster: fastest, best texture, ideal for one or two slices.
- Oven or toaster oven: best for reheating several slices evenly.
- Room temperature: gentle, no heat needed, takes about an hour.
- Refrigerator overnight: slow but even, good for next-day breakfast.
- Microwave: fastest option, but cover it and use short bursts to avoid drying it out.
Does Freezing High-Protein or Low-Sugar Banana Bread Need Different Care?
Denser, high-protein loaves freeze a little differently than a classic sugary banana bread, and it’s worth knowing why before you toss a batch in the freezer. Sugar acts as a natural moisture-holder in baked goods, so a recipe with meaningfully less sugar has less of that built-in protection against drying out. Combine that with the tighter, denser crumb you get from added protein, and you’ve got a loaf that benefits from a bit of extra care at freezing time.
A few adjustments make a real difference:
- Cut slices slightly thicker, closer to the one-inch end of the range, since more mass per slice helps retain moisture during freezing and reheating.
- Add an extra layer of wrap. If you’d normally single-wrap a standard loaf, double-wrap a high-protein one.
- A vacuum sealer is especially worth using here, since it removes the air pockets that dry out a lower-moisture crumb fastest.
- A thin smear of butter on the cut surface before wrapping can add a small buffer against dryness, particularly if you plan to store slices toward the 4-month end of the window.
Bell’s Protein Pantry’s Banana Bread mix delivers over 17 grams of protein per serving with a formulation that’s 39% lower in sugar than leading brands, so these tips matter more than they would with a standard recipe. If you want to see exactly how that protein content breaks down per slice, our guide on banana bread protein content walks through the numbers.
A Small Habit That Pays Off Every Week
Every time we bake a loaf here at Bell’s, we slice off four to six pieces and stash them in the freezer before the rest of the loaf even makes it to the counter. It means there’s always a slice ready for a rushed morning, no matter how the week is going.
A Freezer-Friendly Way to Meal Prep Breakfast

Bake a loaf, slice it, freeze half using the steps above, and you’ll have breakfast solved for the next month without touching the oven again. Browse the Banana Bread mix to get started, or check out the full lineup of protein baking mixes if you’re planning to stock the freezer with more than one flavor.
Sources
- How To Store and Freeze Banana Bread — Simply Recipes
- How To Freeze Banana Bread For Later And How Long It’ll Last — Tasting Table
- The one thing I always do when making banana bread (and you should too) — The Kitchn
- Can you freeze muffins? — Taste of Home