
Bake with Whey Protein: Rules for Better Texture

Yes, you can bake with whey protein, and you don’t need a food science degree to get it right. That’s it. That’s the whole trick.
Here’s your immediate next move:
- Grab your go-to muffin or quick bread recipe and pull just one tray’s worth of batter to test the ratio before you commit the whole batch.
- Start conservative: replace 25% of the flour first, then push toward 33% once you know how your oven and ingredients behave.
Key Takeaways
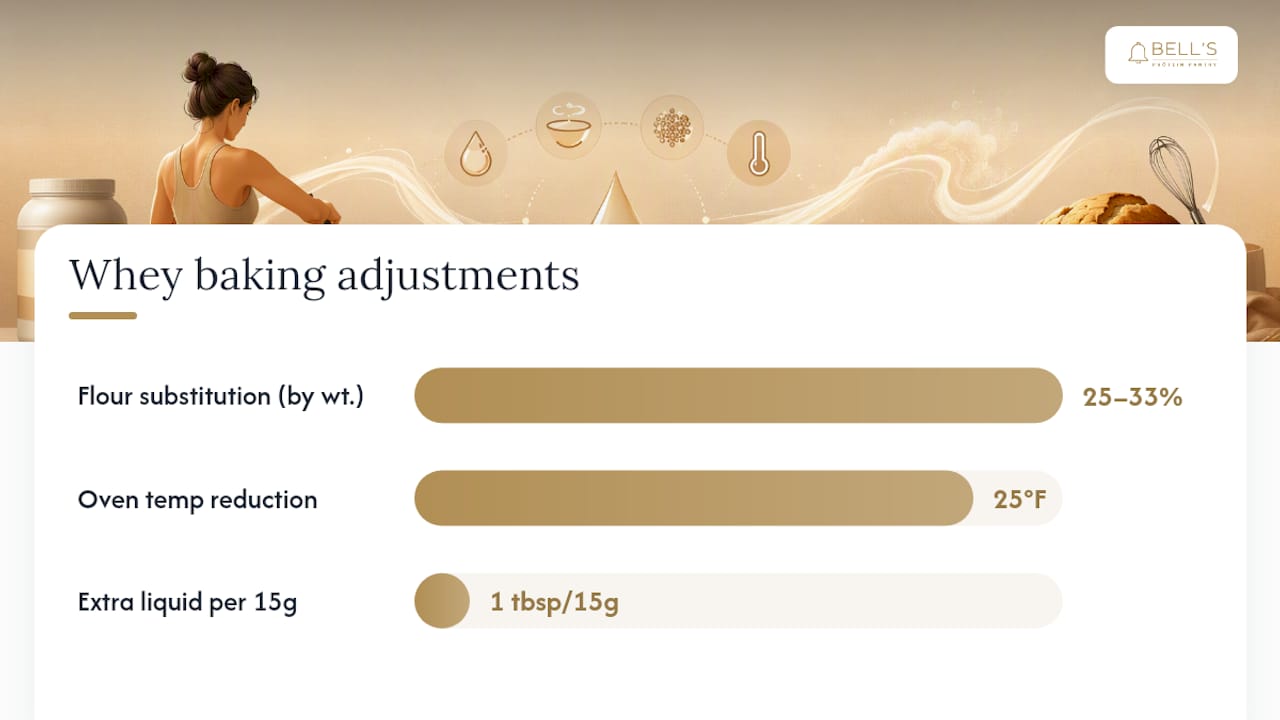
Baking with whey protein works when you replace 25% to 33% of your flour, add extra liquid, and drop your oven temperature by roughly 25°F.
| Point | Details |
|---|---|
| Follow the 25 to 33% rule | Replace no more than a third of your flour with whey protein powder by weight. |
| Lower your oven temperature | Drop it by about 25°F to slow drying and prevent overbrowning on the outside. |
| Add moisture to compensate | Include Greek yogurt, mashed banana, or an extra tablespoon of liquid per 15g of protein. |
| Choose your protein type deliberately | Isolate browns less and absorbs less liquid; concentrate gives richer flavor at lower ratios. |
| Skip the guesswork with a tested mix | Bell’s Protein Pantry mixes deliver 17 to 19g of protein per serving with ratios already worked out. |
Table of Contents
- How to Bake With Whey Protein Using the Right Substitution Ratio
- Which Protein Powder Works Best for Baking
- Baking Adjustments That Prevent Dry, Rubbery Results
- How to Convert Your Favorite Recipe Step by Step
- Starter Recipes That Take Whey Protein Well
- The Food Science Behind Whey and Baked Goods
- Fixing Common Whey Baking Mistakes
- When to DIY and When to Reach for a Tested Mix
- A Baking Mix That Skips the Trial and Error
- Frequently Asked Questions
- Sources
How to Bake With Whey Protein Using the Right Substitution Ratio
The formula is simple: replace 25% to 33% of your total flour, by weight or volume, with whey protein powder. Go higher than that and you’ll hit a ceiling fast, especially with whey isolate, which behaves more aggressively in a hot oven than concentrate does.
Here’s how that plays out with real recipes:
- 1 cup flour recipe: Use about ¾ cup flour + ¼ cup whey protein powder.
- 1½ cups flour recipe: Use about 1 cup flour + ½ cup whey protein powder.
- 2 cups flour recipe: Use about 1⅓ cups flour + ⅔ cup whey protein powder.
Why not just swap it 1:1? Whey protein absorbs liquid differently than flour does, and it lacks the starch structure that gives baked goods their familiar chew. Push the substitution too far and you’ll end up with a dense, dry brick instead of a muffin.
Pro Tip: Weigh your flour and whey with a kitchen scale instead of eyeballing cups. Protein powders pack differently than flour, and a scale removes the guesswork entirely.
Which Protein Powder Works Best for Baking
Not all protein powders behave the same way in a hot oven, and picking the wrong one is the fastest route to a dry, chalky loaf.
- Whey concentrate: Browns more and absorbs more liquid, but delivers the richest, most traditional flavor. Keep replacement around 20% to 25% by weight.
- Whey isolate: Absorbs slightly less liquid and browns more evenly than concentrate, so you can push closer to 25% to 30%.
- Whey and casein blends: Casein slows staling, so these blends hold moisture longer than whey alone.
- Nonfat dry milk (NFDM): A gentler alternative when you want a protein boost without whey’s stronger structural effect.
- Plant proteins: Tend to bake fluffier than whey, according to test-kitchen comparisons, but often carry a stronger, earthier flavor.
For muffins and quick breads, concentrate or a blend works well. For cookies where you want a crisp edge, isolate’s lighter browning helps you avoid overdone bottoms.
Baking Adjustments That Prevent Dry, Rubbery Results
Whey protein pulls moisture toward itself as it bakes, which is exactly why so many protein-powder recipes come out of the oven dry and tight. Four adjustments fix most of that.
Drop your oven temperature. Lower it by about 25°F, so a 350°F recipe bakes at 325°F instead. This slows moisture loss and prevents the outside from setting before the inside cooks through.
Add moisture and fat. Greek yogurt, mashed banana, applesauce, or a spoonful of nut butter all help. As a starting point, add extra liquid to compensate for whey’s higher liquid absorption, such as about a tablespoon more per scoop of protein powder.
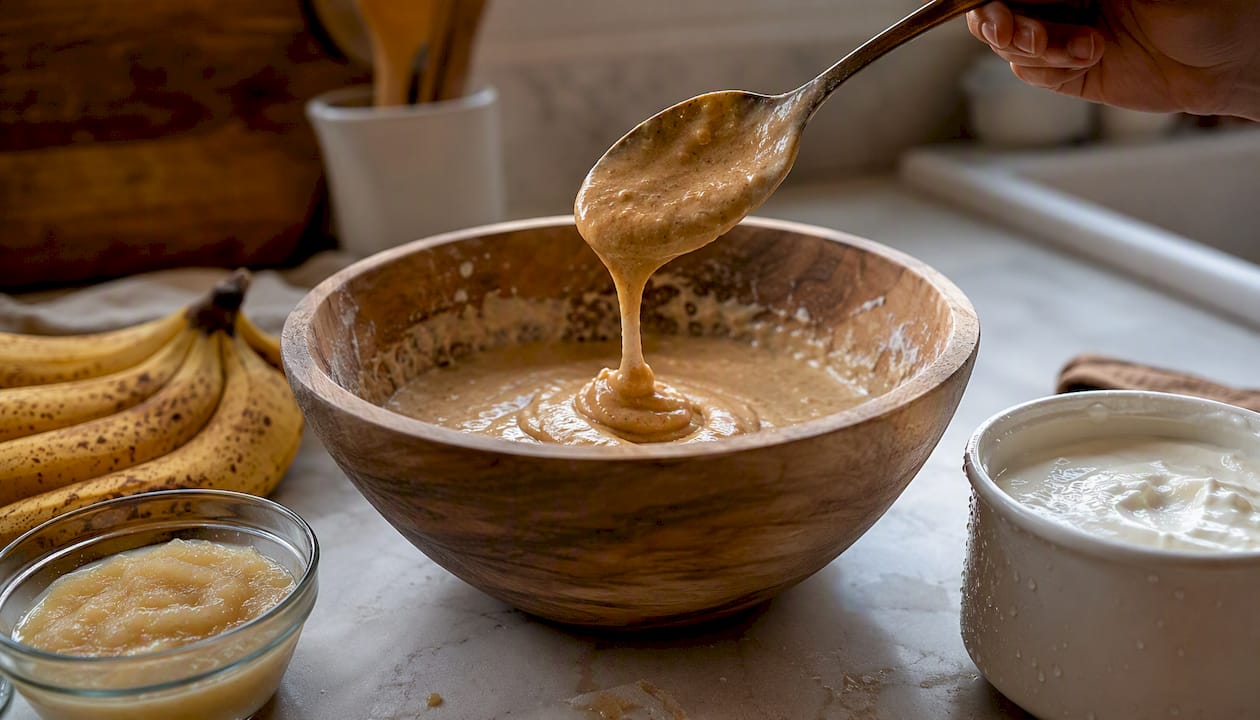
Mix gently, and don’t overwork the batter. Fold just until combined. Overmixing activates the protein network too aggressively and leaves you with a tough, rubbery crumb instead of a tender one.
Grease your pans generously and preheat fully. Whey batters stick more than standard flour batters, and an underheated oven makes rise problems worse.
Too much lift combined with a dense, protein-tightened crumb is what causes that sunken, collapsed top.*
How to Convert Your Favorite Recipe Step by Step
Converting an existing recipe isn’t complicated once you’ve done it once or twice. Follow this order:
- Calculate your flour replacement. Take 25% to 33% of the total flour weight and swap it for whey protein powder.
- Adjust your liquid. Add roughly 1 tablespoon extra liquid per 15 grams of protein powder swapped in.
- Tweak your leavening. Reduce baking powder or baking soda slightly if the recipe already uses a full protein-powder scoop.
- Lower your bake temperature by 25°F and check for doneness a few minutes early.
- Test one tray first. Confirm texture and rise before committing the whole batch.
Here’s what that looks like for a 12-muffin banana bread recipe: replace part of the flour with whey protein powder while adjusting liquids accordingly, add 2 extra tablespoons of mashed banana or yogurt, drop the oven from 350°F to 325°F, and pull the tray a few minutes early. Check that the batter holds a thick, scoopable consistency, not a runny one, before it goes in the oven.
Starter Recipes That Take Whey Protein Well
Some bakes are forgiving. Others punish every mistake. Start with the forgiving ones.
- Banana muffins: Dense and moist by nature, so they hide whey’s drying tendency well. A standard scoop typically adds 15 to 20 grams of protein per serving.
- Protein cookies: Chewy textures mask crumb tightening, and a small batch bakes fast enough to test quickly.
- Protein quick bread: Loaf-style batters tolerate the extra moisture additions without falling apart.
Bell’s Protein Pantry’s banana bread mix and blueberry muffin recipes both fall into this forgiving category, which is part of why they work so reliably. Delicate sponge cakes and angel food cakes are the riskiest place to experiment, since they depend on a light, unweighted structure that whey tends to collapse. Always test a small batch before scaling up to a full recipe.
The Food Science Behind Whey and Baked Goods
Whey protein denatures between about 158°F and 176°F, and once it does, it forms a gel-like network that behaves a little like gluten. That’s useful for structure, but it also tightens the crumb and pulls moisture away from the rest of the batter.
Lab research on frozen dough backs this up: untreated whey protein concentrate can weaken the gluten network and reduce loaf volume, while heat-treated whey performs closer to a standard flour control. That’s the science behind every adjustment already covered here.
- Lower oven temperature slows the gel-setting process, giving moisture more time to distribute.
- Extra liquid and fat offset whey’s higher water absorption.
- Reduced leavening compensates for a denser, tighter structure that can’t support as much lift.
Fixing Common Whey Baking Mistakes
Most whey baking problems trace back to one of five causes.
- Dry crumb: Too much whey, not enough added liquid. Add fat or a moisture-rich ingredient next time.
- Rubbery texture: Overmixing, or too much protein without added fat. A tablespoon of starch like tapioca can interrupt the protein network if the batter’s already too dense.
- No rise or collapsed top: Too much leavening fighting a dense structure. Cut baking powder by 25%.
- Excessive browning: Oven too hot, or concentrate used instead of isolate.
- Off-flavors: Old or low-quality protein powder, or too much powder overwhelming the recipe’s other flavors.
Press the crumb gently; if it springs back slowly and feels tacky, it’s undercooked. If your muffins turn out dry anyway, don’t toss them. Crumble them into parfaits or overnight oats instead.
When to DIY and When to Reach for a Tested Mix
We’ve spent plenty of time in the kitchen figuring out where whey helps and where it fights back, and that testing shaped how Bell’s Protein Pantry mixes are built. DIY conversion makes sense when you want full control over flavor and you’re only baking a small batch. Reach for a tested mix when consistency matters more than experimentation, when you want a reliable 17 to 19 grams of protein per serving without recalculating ratios, or when you just don’t have time to troubleshoot a dry batch on a Tuesday night.
A Baking Mix That Skips the Trial and Error
If the substitution math and oven-temp tweaking above sound like more troubleshooting than you want on a weeknight, Bell’s Protein Pantry built its mixes to solve exactly that problem. Every ratio, every hydration adjustment, and every leavening tweak has already been tested, so you scoop, mix, and bake without guessing.

Our banana bread and blueberry muffin mixes deliver:
- Bakery-quality texture without the dry, dense crumb that comes from a rushed DIY conversion.
- A clear 17 to 19 grams of protein per serving, so you’re not estimating.
- 39% less sugar than leading brands, without sacrificing flavor.
- Pre-tested flour-to-whey ratios, so there’s no conversion math left for you to do.
Browse the full protein baking mix collection and pick a bag for this weekend’s bake.
Frequently Asked Questions
Can I bake with protein powder instead of flour entirely? No. A full 1:1 swap fails because whey lacks the starch structure flour provides. Stick to the 25% to 33% replacement range for reliable texture.
Does heat destroy the protein in whey when you bake with it? Baking denatures whey protein, but denaturing doesn’t remove the protein content or its nutritional value. It simply changes its structure, forming the gel network responsible for a tighter crumb.
What’s the best protein for baking, whey or plant-based powder? Whey typically has a more neutral flavor and works well in most recipes. Plant proteins can bake fluffier but often carry a stronger, earthier taste that shows up more in delicate bakes.
Is casein or whey better for baked goods? Whey sets quickly and helps structure form early, while casein resists staling longer. Blends of the two often outperform either one alone for moisture retention over multiple days.
How do I store whey protein baked goods to keep them fresh? Store in an airtight container at room temperature for two to three days, or refrigerate for up to a week. Protein-heavy bakes dry out faster than standard ones, so wrap them tightly and consider freezing extras.
Sources
- How to Bake with Whey Protein Powder | DaVita
- The Best Protein Powders for Baking - Which Protein Powder Is Best for Baking | Women’s Health
- Chapter: Influence of dairy ingredients on baking properties and rheology (Wiley book chapter)
- Best Protein Powder for Baking: 10 Brands Ranked | BakingSubs
Recommended
- High Protein Muffins: 12–19g Per Serving Recipe Guide – Bell’s Protein Pantry
- Fiber and Protein Snacks: Your Home-Baking Guide – Bell’s Protein Pantry
- Healthy Blueberry Muffin Recipe: High-Protein Guide – Bell’s Protein Pantry
- Blueberry Protein Muffins: High-Protein Recipe Guide – Bell’s Protein Pantry